Replacing your Keurig filter is quick and easy. Start by gathering a compatible new filter cartridge and soaking it in clean water for five minutes. Next, remove the old filter by pressing the side tabs and pulling out the filter holder. Clean the holder, place the new filter inside, and snap it back in securely. Finally, fill the water reservoir with fresh, filtered water. With these steps done, you're ready to enjoy great coffee, and there's more to learn for hassle-free maintenance.
Replacing your Keurig filter is a straightforward task that can greatly enhance your coffee's flavor. Keurig water filters play a crucial role in removing impurities and reducing chlorine from your brewing water. By regularly changing the filter, you not only maintain the best taste of your coffee but also prevent bacterial growth within your machine. It's recommended that you replace the filter every two to three months to keep your coffee experience at its best. Regular filter changes help ensure optimal performance and flavor in your coffee.
To prepare for the replacement, start by gathering a new filter cartridge that's compatible with your specific Keurig model, whether it's the K-Classic Water Filter or another type. Have a glass of water ready for soaking the new filter. Before you get into the process, empty the water reservoir. Familiarize yourself with your model's filter holder design, and don't forget to check the manufacturer's instructions for any specific requirements.
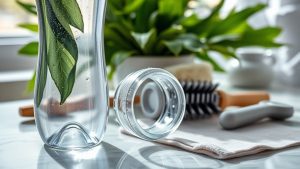
Gather a compatible new filter cartridge and prepare a glass of water for soaking before starting the replacement process.
When it's time to remove the old filter, press the side tabs on the filter holder to release it. Gently pull up on the filter holder to take it out of the reservoir. Dispose of the old filter responsibly and take a moment to clean the mesh bottom of the filter holder to remove any debris. Set aside the removed parts, as you'll need them for reassembly.
Next, you'll want to activate the new filter. Soak it in clean water for at least five minutes, then rinse it with fresh water to wash away any loose charcoal particles. To fully activate the charcoal, briefly dip the filter assembly in water for about 30 seconds. Ensure all the water you use is cold and clean to avoid contamination. Allow any excess water to drip off before moving on to the installation phase.
Now it's time to install the new filter. Place it into the holder, confirming it's correctly positioned. Snap the holder tabs until you hear them click to secure the filter. Reinsert the filter holder into the water reservoir's designated slot. Listen for that snap or click sound to confirm it's securely attached, and double-check that the filter is seated properly to avoid leaks or malfunctions.
To reassemble your Keurig, fill the water reservoir with filtered water to the recommended level. If you'd removed the reservoir, reattach it to the machine. Run a water cycle without brewing any coffee to flush out any residue. Keep an eye out for leaks or unusual noises during this initial use. Regularly check the filter's condition and replace it as needed for continued best performance.
For the best filter performance, always use genuine Keurig filters to guarantee compatibility and effectiveness. Regular cleaning of the outside of your Keurig will prevent dust buildup, and proper soaking times for the filter will help avoid charcoal dust in your machine. Keeping the water reservoir clean is key to preventing bacterial growth, and consider descaling your Keurig regularly to eliminate mineral deposits.
Following these steps will assure a perfect cup of coffee every time.
Conclusion
Now that you know how to replace your Keurig filter, you can enjoy fresh, flavorful coffee with every brew. It's as easy as updating your social media status! Just remember to check and replace your filter every few months to keep that coffee tasting its best. With these simple steps, you'll guarantee your machine runs smoothly and efficiently. So, grab a new filter, and let the good times (and great coffee) roll!


